This dataset is located in the left column, under the Localization section. The region is specified in the user's card, as well as set in the institution's card.
Detailed Description:
On the employee's tablet in the institutions section, only those institutions whose region matches the user's work region will be displayed. Similarly, only those clients whose place of work (institutions) matches the employee's region will be shown. If a user tries to enter a client or institution with a region that does not match what is specified in the user's card, that entry will "disappear" from their device after synchronization. The entry will be hidden from view due to the mismatch of regions.
Upon opening the Dataset, a table with the following columns will appear: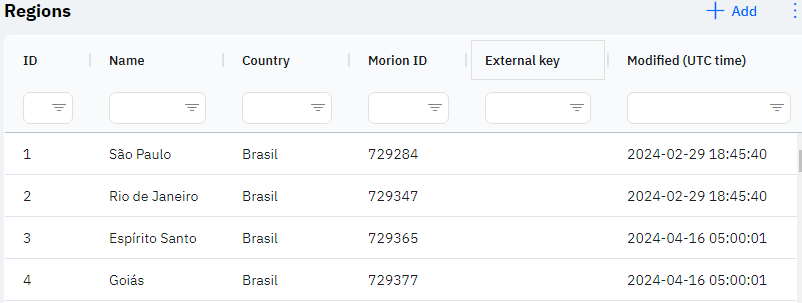
Id - This displays the region ID in the database. When adding a new region, this value is generated automatically and there is no need for further editing. This value may be useful, for example, when submitting a request to technical support.
Name - The name of the region, by which you can select a region in the user's or institution's card.
Detailed Description:
Users cannot change or view their region. Changes to the user's card are made by technical support or by an employee who has access to the Admin Panel. A user's region can be viewed in the Users section by clicking on the eye icon next to the interested user in the Working area and Localization section.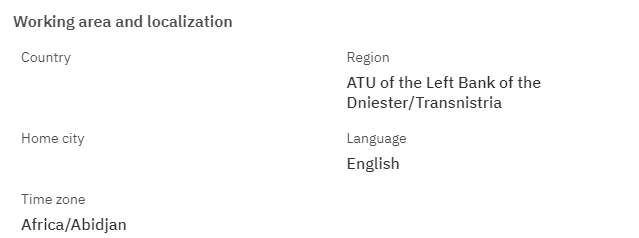
The region name is displayed on the user's device when adding a new institution or modifying an existing one. To select a region, open the institution, click modify, and select the desired value in the region line:
In the new window that opens, the user can choose the necessary region from the list of those that are linked to them in the user's card:
Users can also see the region in the preview mode in the list of institutions.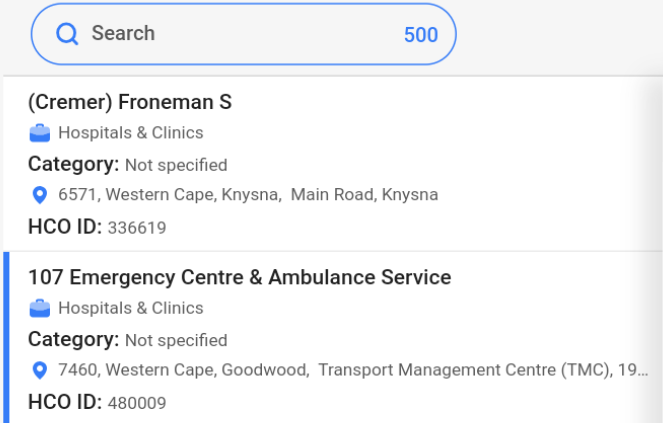
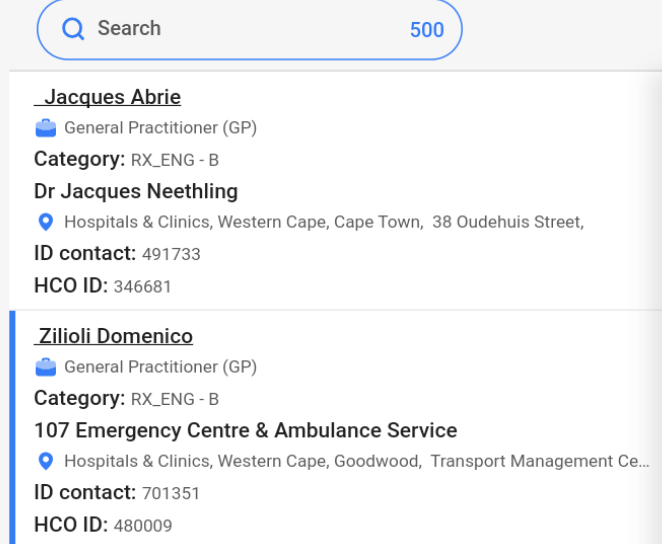
And in the list of clients:
Country - This column will display the country to which the region is linked.
Morion ID - The identifier for the region, which can be obtained from the database verification department.
External Key - This column will display the external key. This can be used to link the information with external data.
Modified - Displays the date of the last change to the row. The time is displayed in Greenwich Mean Time (UTC 0).
To add a new region, click on the + Add icon in the upper right corner. After clicking, a window will open where you can fill in the following fields: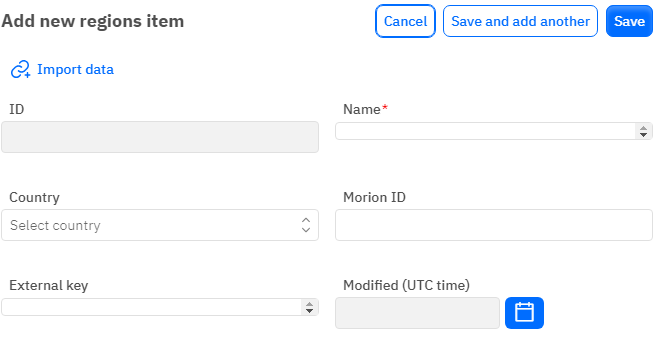
Id - This field is not editable; it will automatically be added when saving the new region.
Name - A mandatory field to fill out. You must specify the name of the region.
Country - An optional field to fill out; you may specify the country of the region.
Morion ID - An optional, numeric field to fill out. To add a Morion ID, it must be obtained from the database verification department.
External Key - An optional field; you can enter an external key for the row.
Modified - A non-editable field, automatically set after a change or addition of a row.
After entering all necessary fields, you can click Save to save the data, click Save and Add More to save the data and open a new window for filling, or Cancel if the data does not need to be saved.