Log in to GeoForce .
Enter your login and password, and click the "Log in" button.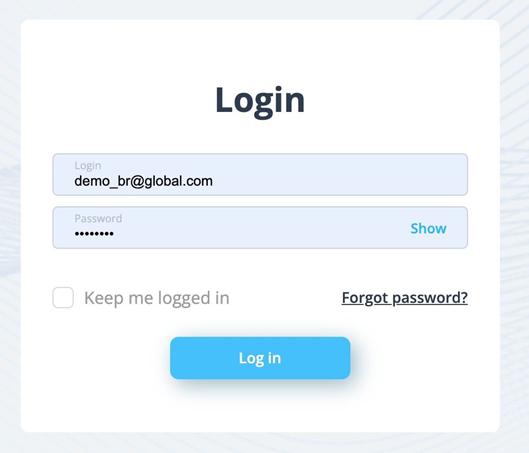
Next, in the opened window select GeoForce service.
After opening the service, the following tabs will be displayed at the top.

Direction - contains a drop-down list of Business units.
Loupe - search engine for HCO.
Ruler - measures the distance.
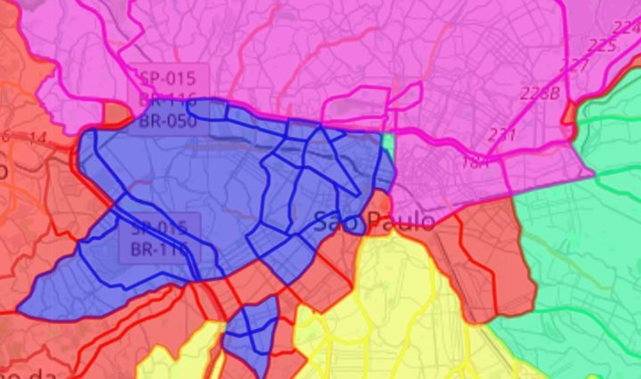
Top Bricks - highlights of the polygons depends on settings.
Balancing - tab for balancing the territory powered by AI.
Number of balancing results - shows number of possible variations of the balancing.
FTE calculation - tab for calculating the number of Reps for the territory.
Language - preferable language.
USER - username and logging out from the system.
The following tools will also be available below:
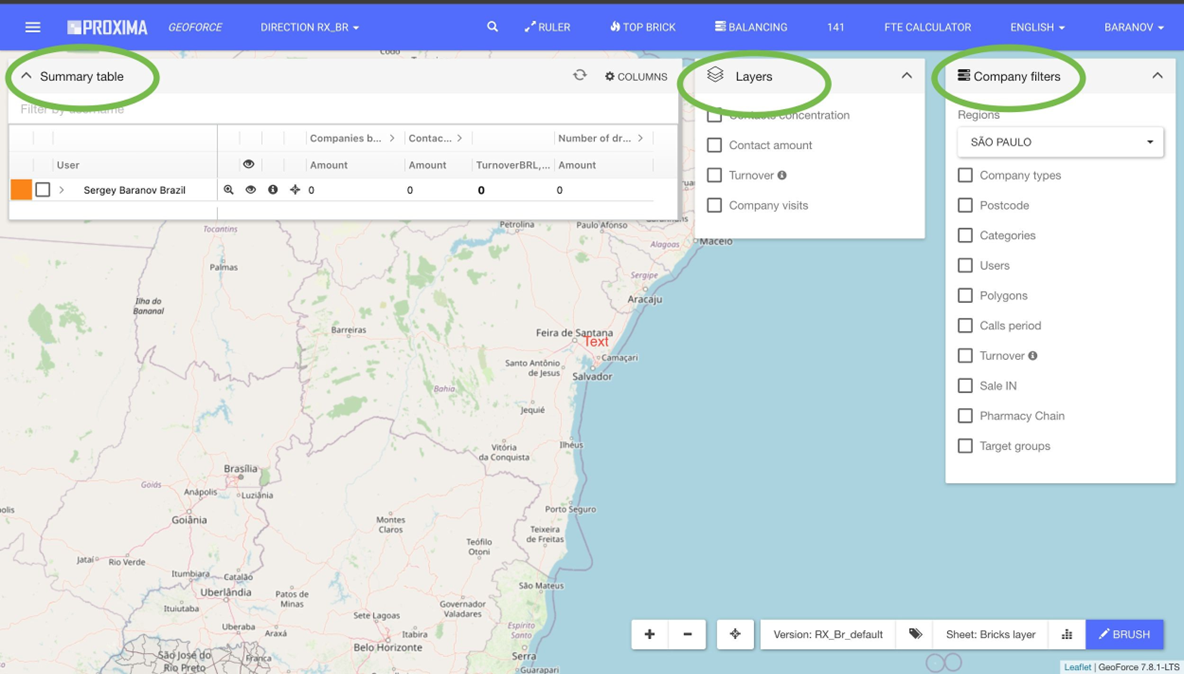
Company filters. Allows you to display information on the map according to the following parameters:
- Regions. Allows selecting the regions with which the available visibility zone can work;
- Organization Types. This filter allows selecting and specifying the types of institutions to be displayed on the map;
- Users. Displays institutions on the map that fall within the territory of the selected user;
- Polygons. Displays only the institutions that fall within the selected polygon on the map.
- Range. Displays institutions on the map visited within the specified time interval;
- Turnover. Displays retail outlets with a specified turnover. The information icon, when hovered over, shows the data granularity.
- SaleIN. Displays points where there are sales (Sale IN) of the specified brand according to the distributor's report within the specified period in the filter.
Layers. Allows you to layer the map according to the following parameters:
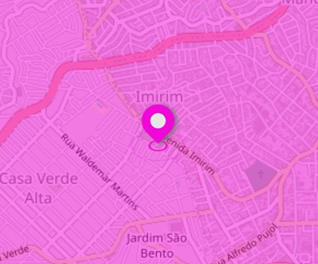
- Specialists Concentration. Enabling the "Specialists Concentration" layer will display a heat map indicating the areas with the highest concentration of specialists in a selected specialization or set of specializations.

- Number of Specialists. When selecting the "Number of Specialists" layer, green markers are displayed around the institutions on the map.
The size of the marker depends on the number of employees at the area.

- Turnover. When selecting the "Turnover" layer, the markers of institutions will be inflated based on the turnover volume of the retail outlet.

- Visits to Organizations. The layer enables the option to colorize points with different colors based on visits by Reps.

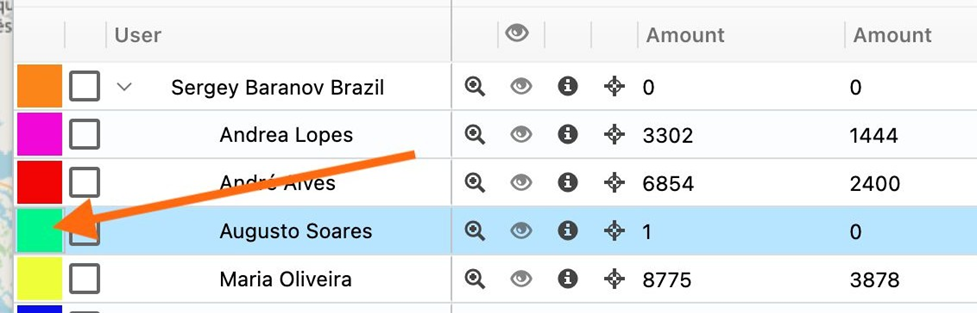
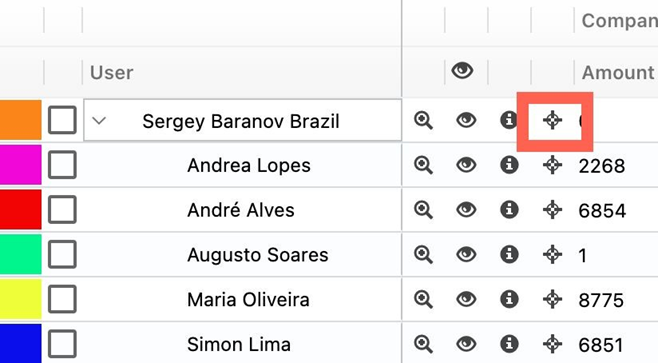
Summary table. The summary table contains a hierarchical chart where each person is assigned a color on the map. 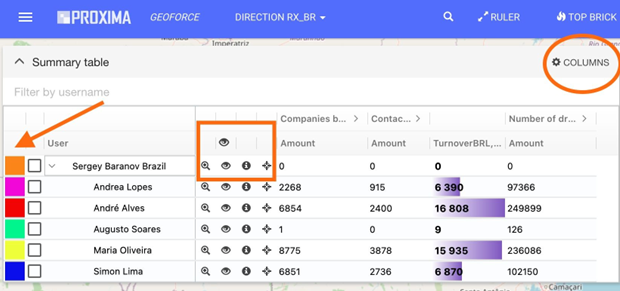
The following icons are displayed in the table:
- The icon «Magnifying glass» - shows the service is centered on all territories that are attached to the user.
- The icon "Eye" - When you click the icon is replaced with crossed-eye, and all polygons that belong to the user stop showing on the map. After re-pressing, the polygons will be displayed on the map again.
- The icon «Information» is a panel with the whole list of institutions that have got into the sketched area that opens when you click.
- The icon «Start point » shows the starting point of the Rep.
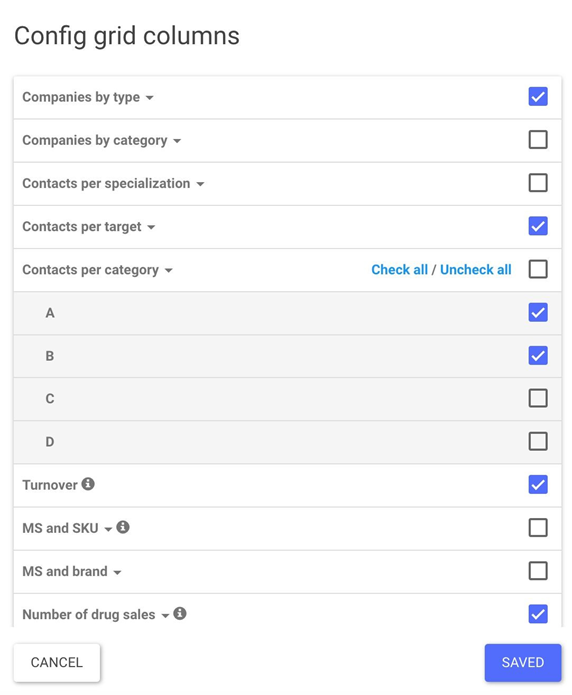
- In the column section, you can select a list of columns with data that you want to display in the area of responsibility of each MR.
As you see above each MR has on its territory amount of HCP and HCP and Turnover as an example.
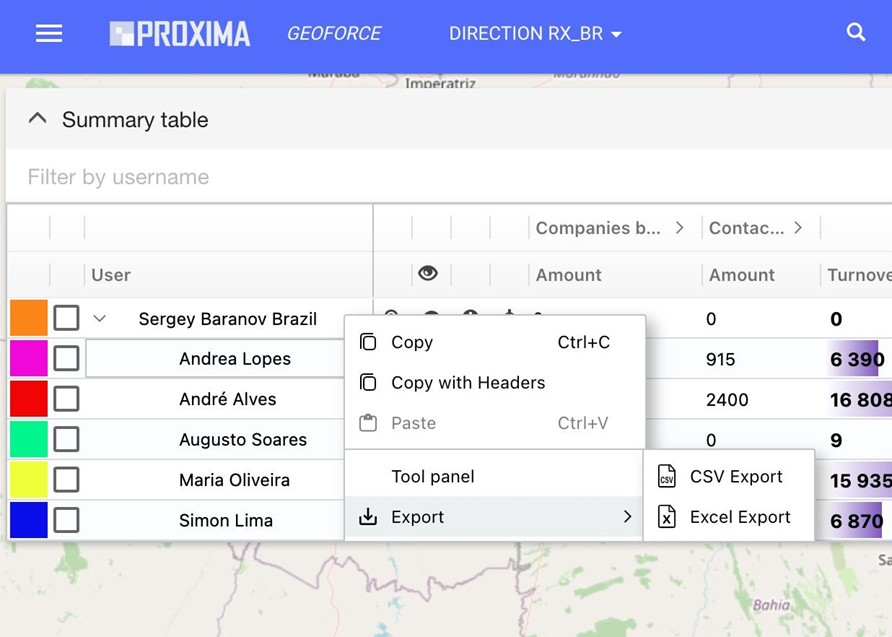
All polygon data displayed in the Summary Table can be uploaded to the local computer in Excel or CSV format. At any point in the Summary Table table, right-click, choose Export, then Excel or CSV Export.
Layers variety
Before loading into the system, you can choose geographical parts: Areas, Cities, smaller polygons.
Having chosen to divide by points: you can on the fly to form a mini territory (Voronoi Polygons). Mini-polygons will be created according to the specified criteria.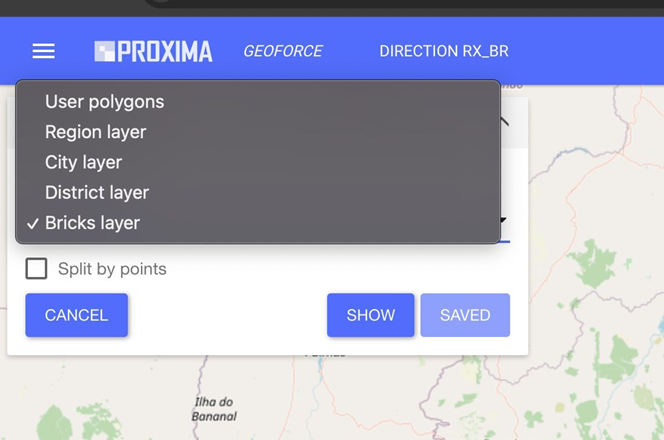
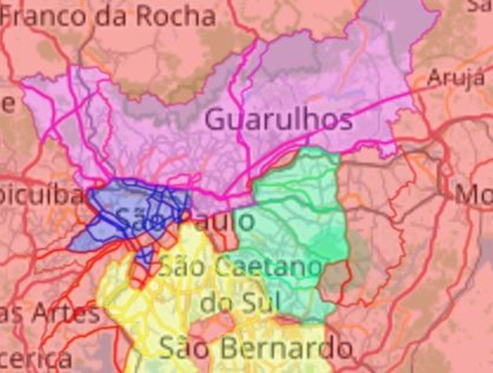
When choosing preloaded polygons or created mini polygons - we can form territories by coloring such polygons with a brush.
Adding new territory alignment
There are two functions for adding a new alignment. These are manual addition and addition via balancing.
1) Manual territory alignment.
- Click on a button BRUSH.

- Select the user to whom we want to transfer the territory. To do this, click on the color indicator next to the user name.
- Click the Brush
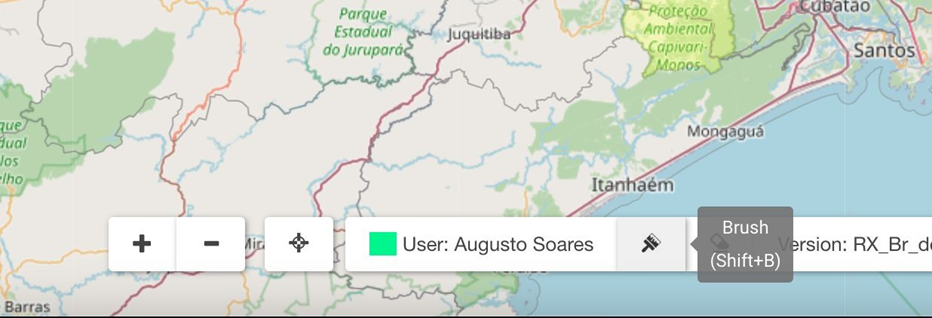
- Pick the area on a map and click on it
- It will be colored at the appropriate colour
2) Balancing territory alignment.
- An icon appears next to the user name in the Summary table. Click the icon below.
- It will show the Pin ( starting point of Rep).
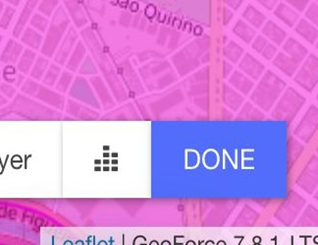
- Click on the area where Rep is starting the route and Pin will stir directly to that area.
- Then Click DONE button in the bottom right corner.
- Click on a button Balancing. You will see the window with parameters and starting points of Reps on a map.
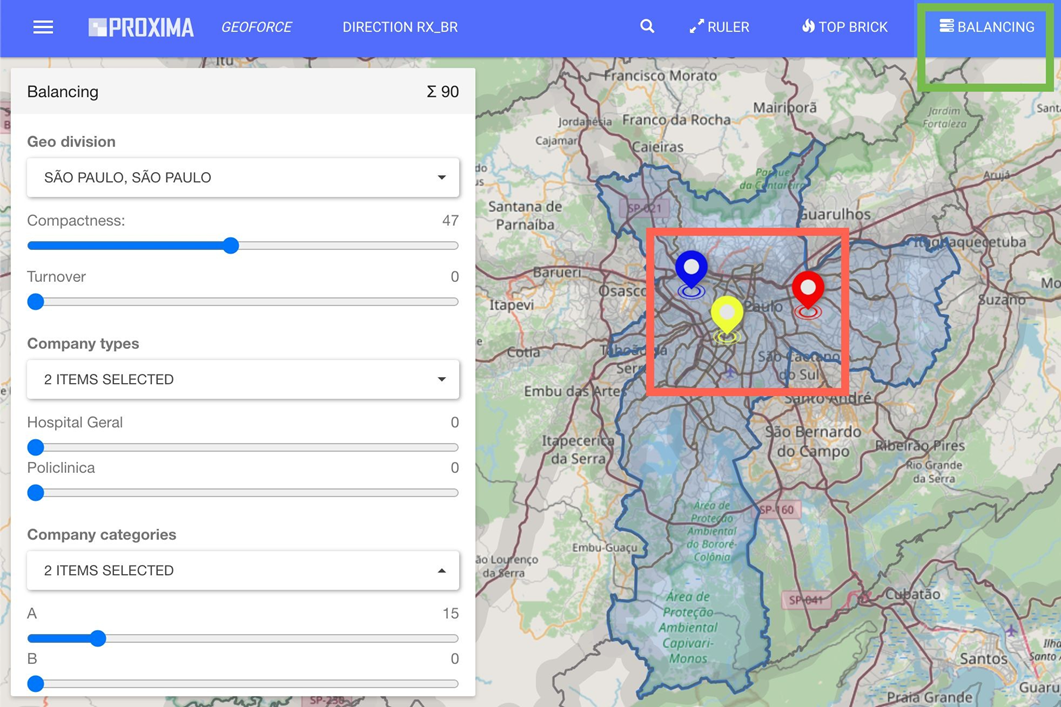
To balance, you must select some of the key parameters:
1. Area;
2. Compact territory;
3. Trade turnover;
4. Types of institutions;
5. Specializations;
- At the top of the form, the balancing represents the sum of the parameters for balancing. The sum must be less than or equal to
100. Select the balancing options you deem necessary to automatically colorize employee areas and level those territories according to their characteristics.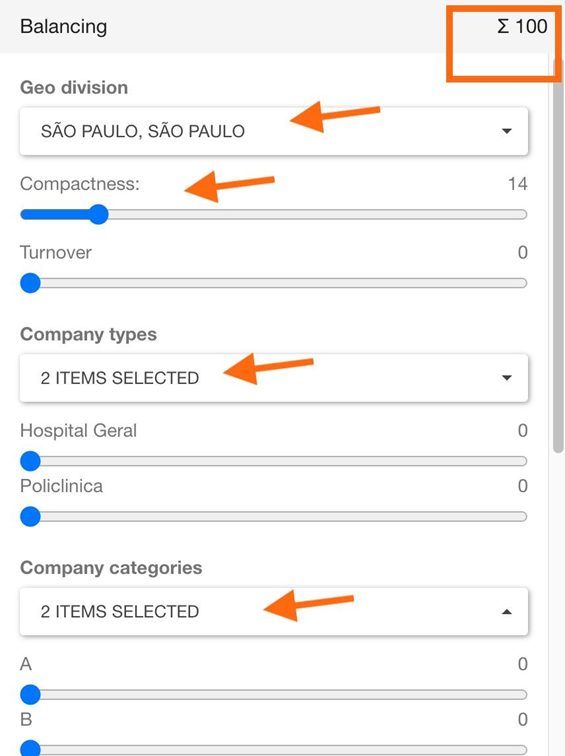
- If the sum is less than 100, the remainder will be added to the compactness of the territory
When you drag all the sliders you need press BALANCE button.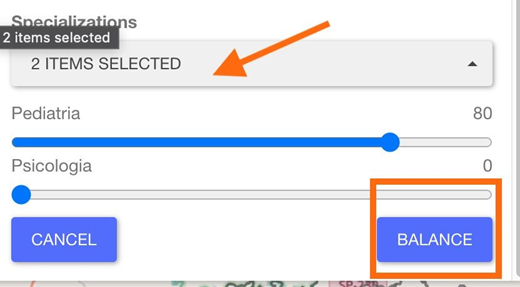
Additional information
To balance territories, the following steps are required:
1. Specify the initial point for the employee or the starting point for the representative's work.
2. Specify the parameters by which territories will be equalized.
3. Review the result of balancing and save it for future reference.
4. After you start the process click on the button DONE in the left bottom.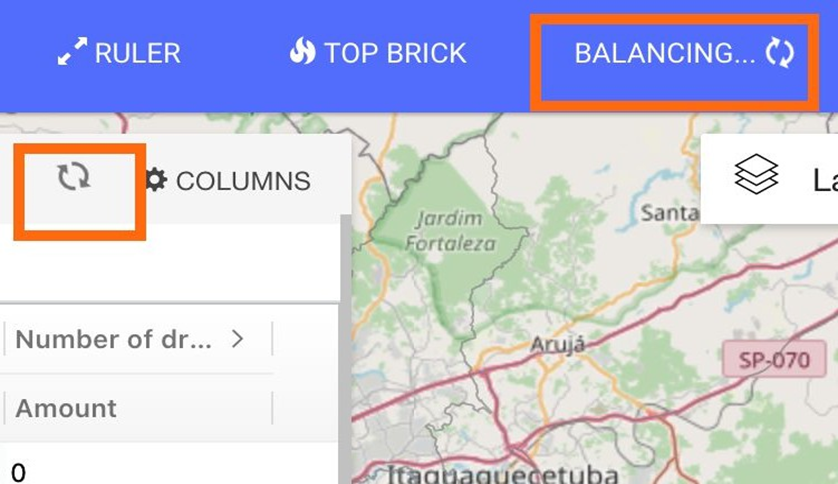
Unassigned territory
- To check the unassigned territory click on the target mark.
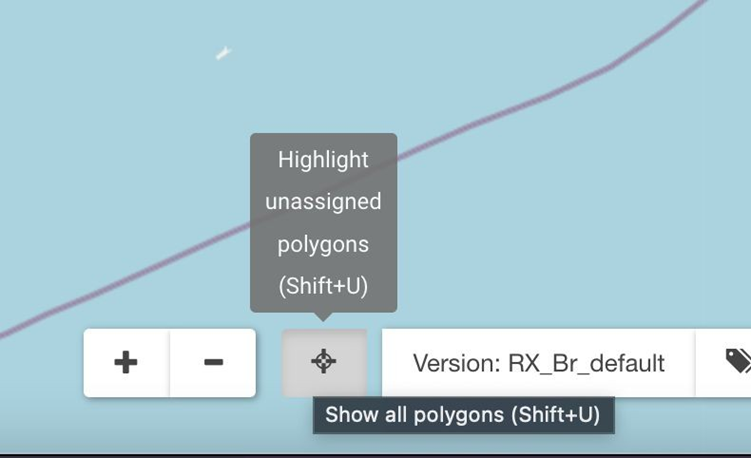
- All unassigned area will be colored in red and will help to understand if some area was overlooked.
- You can color it with the BRUSH.
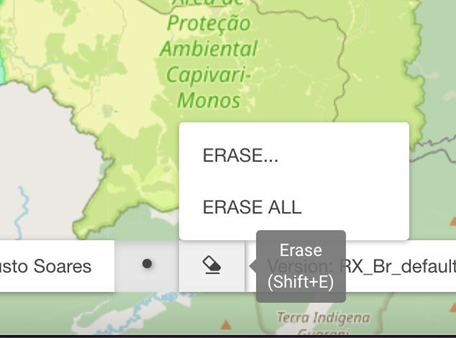
Deleting territory alignment. To erase click the button near the brush and select necessary territory to erase.