This section is located at the top of the administrator panel.
To open it, you need to click on the "Users" button. In this section, you can manage company users, view and change user information, user hierarchy, add new users, and block inactive users.
When you open the section, a table will appear with the following columns: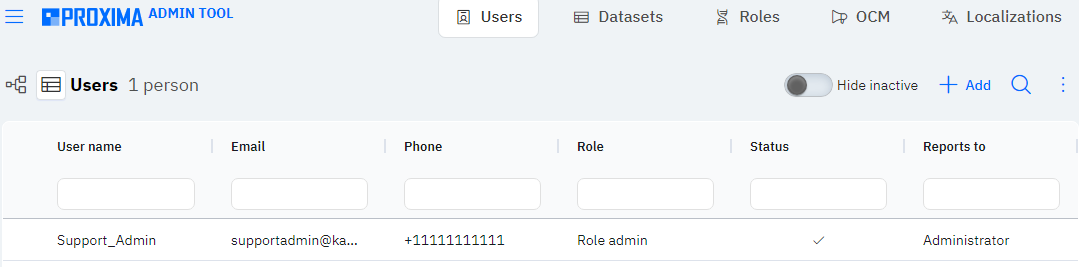
User Name: Last name and first name of the user. Information from this field will be displayed in other sections, for example, when assigning a user responsible for a client or company, when assigning a user a cycle plan, etc.
Email: The user's email address. Information from this field is also used for user login into the system. This field is a unique identifier of the user within the company and cannot be duplicated.
Phone: The user's contact phone number.
Role: This column specifies the user's role. The role determines most of the main settings for the user, visibility of other sections, CRM card settings, lists of available types of visits and tasks, etc.
Status: This column shows whether the user is active. A checkmark indicates the user is working. A cross means the user is blocked.
Reports to: This column displays the user's direct manager in the hierarchy.
To search for users, you can use the magnifying glass button in the upper right corner of the window. Clicking on it will bring up a contextual search bar where you can search for users by any columns presented below.
Users can be displayed in a list, as shown above, or in a tree view. To switch to tree view mode, you need to click on the icon at the top of the list: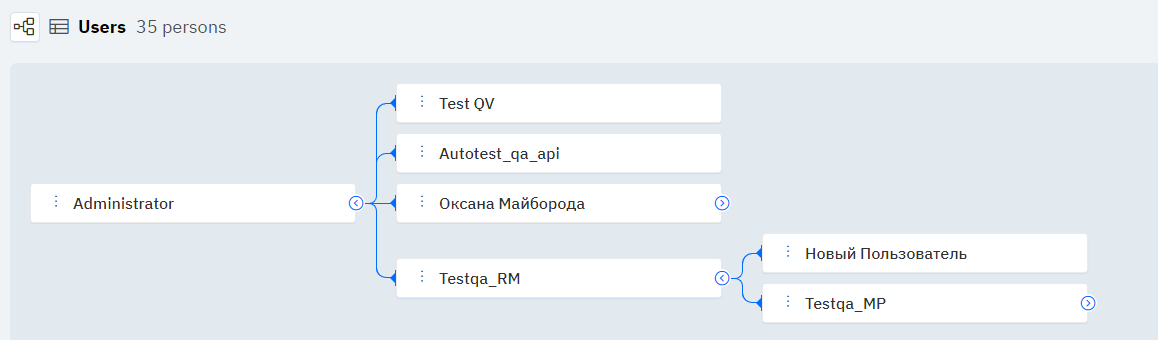
In this display format, you can visualize subordinates and managers, and also track which user sees which group of users. In the CRM system, information is displayed hierarchically, meaning each manager will only see those users who are under his or her supervision or under the supervision of his or her subordinates. To switch to list mode, you need to click the button next to the button to enable tree view.
To open more detailed information about a user, you need to click on the eye icon to the left of the user's name when displayed in list form, or click on the user's name when displayed in tree form.
Upon opening the user card, the following fields will be displayed:
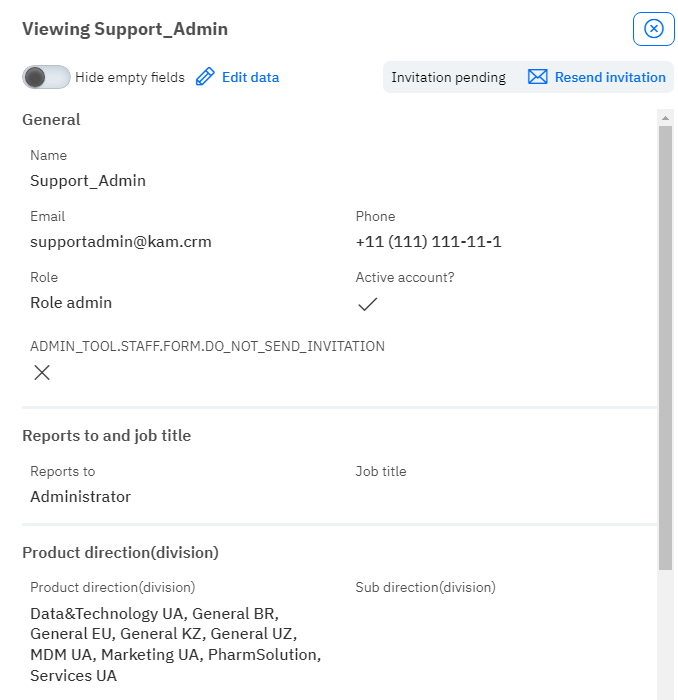
Hide empty fields: This switch changes the view of the card, hiding those fields where no information has been entered.
Edit data: This button enables edit mode for the user card.
Invitation: This field shows whether the user has accepted the invitation to SSO.
Send invitation: Button for sending an invitation to SSO to the user's email.
User Name: Last name and first name of the user. Information from this field will be displayed in other sections, for example, when assigning a user responsible for a client or company, when assigning a user a cycle plan, etc.
Email: The user's email address. Information from this field is also used for user login into the system.
Phone: The user's contact phone number.
Role: This field specifies the user's role. The role determines most of the main settings for the user, visibility of other sections, CRM card settings, lists of available types of visits and tasks, etc.
Active account?: This field shows whether the user is active. A checkmark indicates the user is working. A cross means the user is blocked.
Reports to: This field displays the user's direct manager in the hierarchy.
Job title: This field specifies the user's position.
Product direction: This field lists the user's product directions. The product direction determines the list of preparations and brands available to the user, as well as the list of available categories.
Sub direction: This field lists the user's sub-product directions. Sub-product directions are used for more detailed segmentation of preparations and further identification of the user by their area of work.
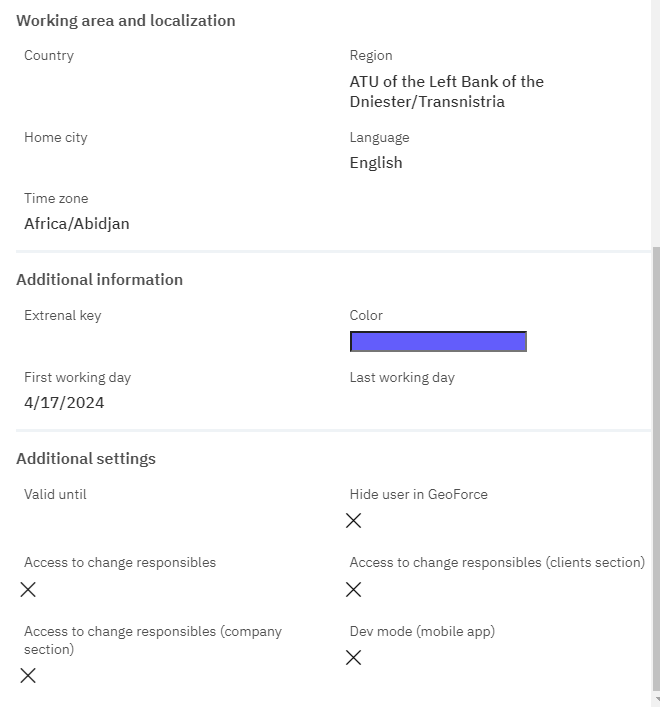
Country: This field displays the user's country. The choice of available regions depends on the country.
Region: This field displays the list of regions for the user. The list of available companies and clients depends on the regions.
Home city: This field displays the city where the user is based.
Language: This field displays the user's language. The language affects the display of information in various CRM sections.
Time zone: This field displays the time zone. The time zone affects how data received from the user's device is automatically adjusted. For correct data display on the server, the time zone must match the time zone on the user's device.
External key: This field will display the external user ID. This can be used to link information with external data.
Color: This field displays the user's color. The user's color affects the color of polygons in GeoForce.
First working day: This field displays the user's first working day. Typically, this is the date of employment.
Last working day: This field displays the user's last working day. Typically, this is the date of termination.
Valid until: This field specifies the date until which additional settings enabled for the user will be valid.
Hide user in GeoForce service: This field shows whether the user is hidden in GeoForce.
Access to change responsibles: This field displays whether the user has access to change the responsibility of clients and companies.
Access to change responsibles(clients section): This field shows whether the user has access to change the responsibility of clients.
Access to change responsibles(company section): This field shows whether the user has access to change the responsibility of companies.
Dev mode (mobile app): This field shows whether debug mode for the mobile application is enabled for the user.